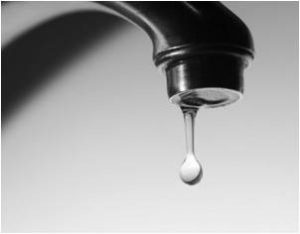
 Ever been trying to sleep but can’t because of that incredibly annoying ‘drip…drip…drip’?
Leaking water faucets waste gallons of water each day, costing you money and depleting one of our most precious commodities.
If you’ve never fixed a leaky faucet, you may be surprised at how easy this simple repair generally is.
Most leaky faucets are caused by loose nuts and worn out washers.
Requirements: A few screwdrivers a new rubber washer a few minutes of your time.
Tip: Remove the old washer and take it with you to ensure you match it correctly at the local home repair superstore or hardware supplier.
If water is leaking at the base of the handle, it is most likely just a loose connection. Use an adjustable wrench and tighten the nut located below the handle.
Most leaks are caused by bad washers. Symptoms of a worn-out washer is a slow leak coming from the faucet, water dripping out of the handles, and water that collects around the back of the handle area. These can easily be replaced by a handy-man or plumber for a very minimal charge.
If you want to attempt to replace the washer yourself, here’s how:
- Turn off the water. Before you start, turn the water off to your faucet. Look underneath your sink for the pipes that run up to your faucet- you should see shut off valves (handles) that you can turn clockwise to turn off the water.
- Plug up the sink to avoid having a screw or a washer accidentally go down the drain.
- Take the faucet handles off. Take out the screw that is holding them on. Some faucet handles might hide their screws behind plastic or metal caps. You might have to pry the cap off with a flathead screwdriver to get at the screws holding the handles on, or unscrew a cap. Once you’ve removed the screws, pry the handles off with a flathead screwdriver.
- Once you have the faucet handle off, remove the old washer that was behind the handle. If there is no washer behind the handle, you will need to add one.
- Simply place the new washer where the old washer was. Basically the hole in the washer should be just slightly bigger than the post that the handle turns.
- Put the faucet handle back on the post and put the screw back in. Tighten the handle until it is “hand tight”. That means tighten the screw until it feels tight without you having to use extra strength to tighten it. don’t over-tighten or you won’t be able to turn the handle to turn water on.
- Turn your water back on by turning the water supply handles under the sink counter-clockwise.
- Check it. If everything went well you shouldn’t have a leaky faucet any longer. If your faucet continues to leak, try tightening the screws on the faucet handles just a bit more. If the faucet still leaks, then it may be time to call a plumber.

I see your site has some fresh articles.
Very informative ~ Thanks!
Writing this content must be time consuming, but you do it anyway – God Bless You!
Great content. Thanks for this!
THANKS! Saved me a call to a plumber. I’m not real handy, but figured I’d try. Found a few YouTube videos, but way over my head. Your article was perfect. Thanks again!
keep up the nice high quality writing, it is uncommon to look a great blog like this one today.
Drr – should have done a search last time before paying a plumber $200.
Thank God I found this before calling him again.
Quick easy fix – I will be sure to check your advice in the future.
Super helpful even though I’m not too handy. Superb Blog!
This one saved me a few hundred dollars – thanks